12 Delicious Desserts to Celebrate the 12 Days of Christmas
This holiday season, treat yourself to a sweet celebration with our “12 Days of Christmas Desserts” guide! Each day brings a delightful new recipe to try, featuring festive flavors and fun twists on classic treats that will make your festivities even sweeter. Let’s get baking and create some holiday magic!
Gingerbread Cookie Decorating Party

Gingerbread cookie decorating is a fun and festive activity that brings everyone together during the holiday season. Picture a table filled with beautifully baked gingerbread cookies, ready to be transformed into delightful creations. The scene is lively, with colorful icing, sprinkles, and candies scattered around, inviting creativity.
As you gather your friends and family, each person can grab a cookie and start decorating. The joy is in the process, whether it’s creating a classic gingerbread man or a whimsical snowflake. Everyone can express their artistic flair, and the laughter and chatter fill the air.
To make your own gingerbread cookies, here’s a simple recipe to get you started!
Ingredients
- 3 cups all-purpose flour
- 1 teaspoon baking soda
- 1 tablespoon ground ginger
- 1 tablespoon ground cinnamon
- 1/2 teaspoon ground cloves
- 1/2 teaspoon salt
- 1/2 cup unsalted butter, softened
- 1/2 cup brown sugar, packed
- 1/2 cup molasses
- 1 large egg
- 1 teaspoon vanilla extract
Instructions
- Mix Dry Ingredients: In a bowl, whisk together flour, baking soda, ginger, cinnamon, cloves, and salt.
- Combine Wet Ingredients: In another bowl, beat the butter and brown sugar until creamy. Add molasses, egg, and vanilla, mixing well.
- Combine Mixtures: Gradually add the dry ingredients to the wet mixture, stirring until a dough forms.
- Chill the Dough: Wrap the dough in plastic wrap and refrigerate for at least 2 hours.
- Preheat Oven: Preheat your oven to 350°F (175°C).
- Roll and Cut: On a floured surface, roll out the dough to about 1/4 inch thick. Use cookie cutters to cut out shapes.
- Bake: Place cookies on a baking sheet and bake for 8-10 minutes. Let them cool completely before decorating.
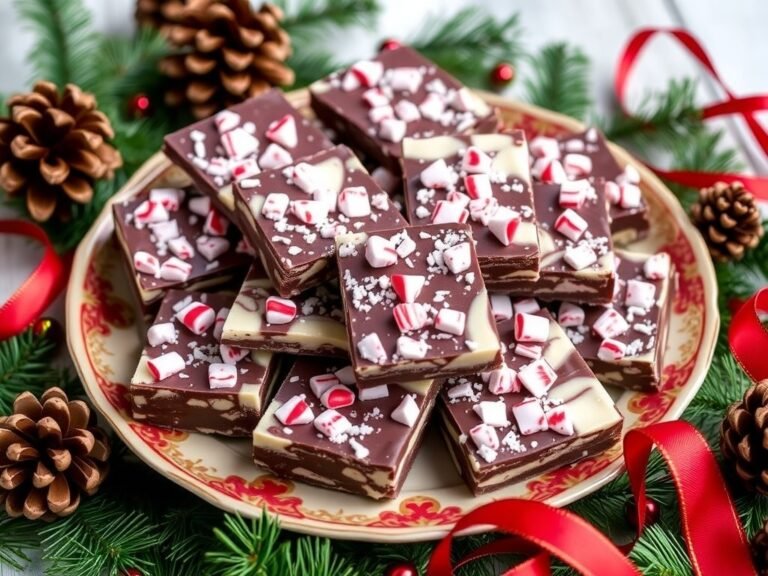
Chocolate Peppermint Bark
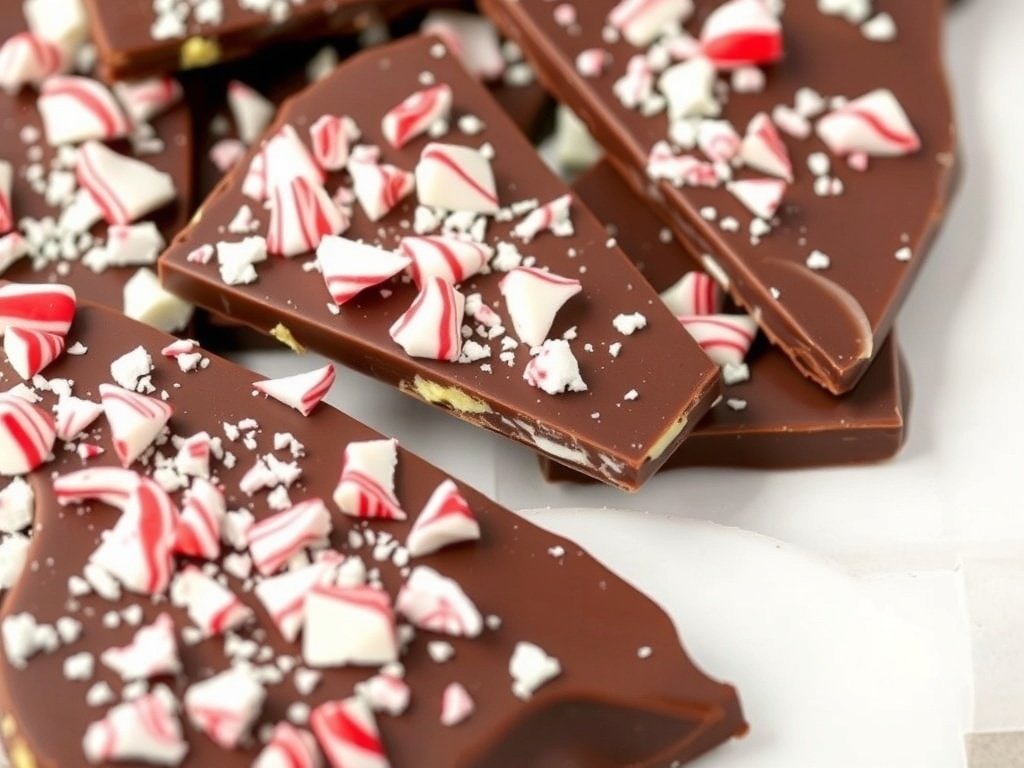
Chocolate peppermint bark is a festive treat that brings together the rich taste of chocolate and the refreshing zing of peppermint. This delightful dessert is perfect for sharing during the holiday season. The image showcases beautifully layered pieces of chocolate bark, topped with crushed peppermint candies. The vibrant red and white of the peppermint adds a cheerful touch, making it a visual delight as well.
Making chocolate peppermint bark is simple and fun. You can easily whip it up in your kitchen, and it’s a great activity to do with family or friends. The combination of creamy chocolate and crunchy peppermint creates a satisfying texture that everyone loves. Plus, it’s a fantastic way to use up any leftover candy canes!
Ingredients
- 2 cups dark chocolate chips
- 1 cup white chocolate chips
- 1/2 cup crushed peppermint candies or candy canes
- 1 teaspoon peppermint extract (optional)
Instructions
- Melt the Dark Chocolate: In a microwave-safe bowl, melt the dark chocolate chips in 30-second intervals, stirring in between until smooth.
- Spread the Chocolate: Pour the melted dark chocolate onto a parchment-lined baking sheet. Spread it evenly to about 1/4 inch thick. Let it cool for about 10 minutes.
- Melt the White Chocolate: In another bowl, melt the white chocolate chips in the same way as the dark chocolate.
- Add Peppermint Extract: If using, stir in the peppermint extract into the melted white chocolate for an extra kick.
- Layer the White Chocolate: Pour the melted white chocolate over the dark chocolate layer. Use a spatula to spread it evenly.
- Add Peppermint: Sprinkle the crushed peppermint candies over the top while the white chocolate is still warm. Press down gently to ensure they stick.
- Chill: Place the baking sheet in the refrigerator for about 1 hour or until the bark is completely set.
- Break into Pieces: Once set, remove from the fridge, and break the bark into pieces. Enjoy your homemade chocolate peppermint bark!
Pumpkin Pie Trifle
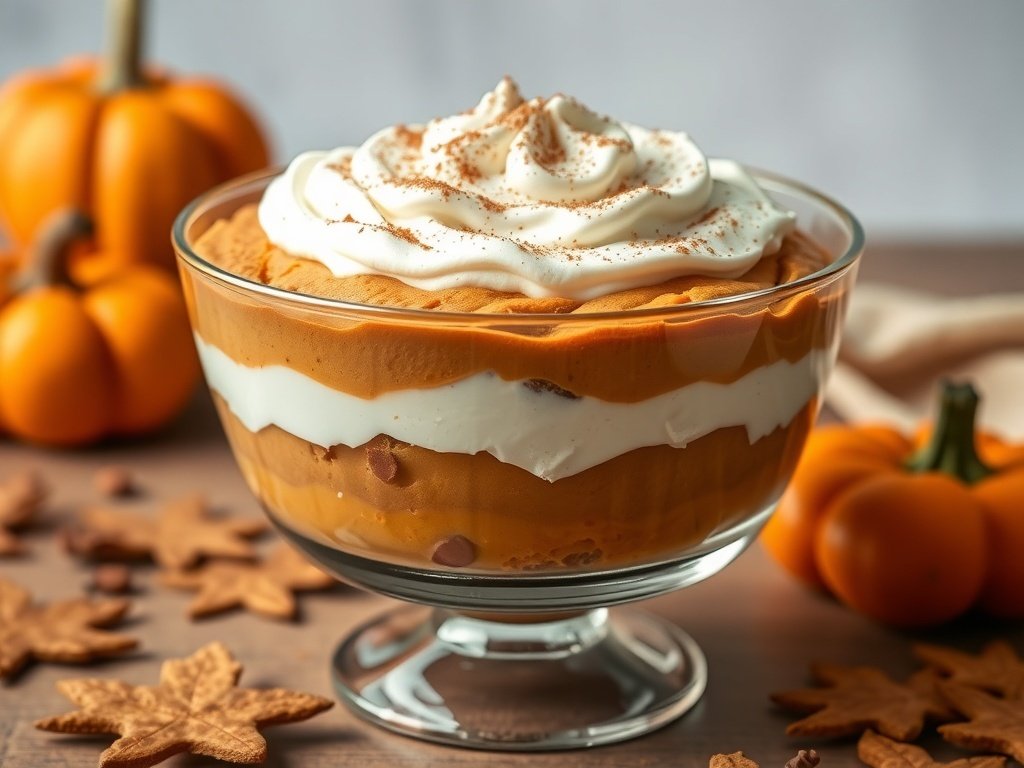
Nothing says festive like a pumpkin pie trifle! This dessert combines the classic flavors of pumpkin pie with layers of creamy goodness. The image shows a beautiful trifle, showcasing vibrant orange pumpkin filling, fluffy whipped cream, and crunchy layers that make each bite a delight.
The trifle is not just a feast for the eyes; it’s also a crowd-pleaser. Perfect for holiday gatherings, it’s easy to make and even easier to enjoy. The combination of textures and flavors will have everyone coming back for seconds!
Ready to whip up this delicious treat? Here’s how to make it:
Ingredients
- 2 cups pumpkin puree
- 1 cup heavy cream
- 1 cup cream cheese, softened
- 1 cup powdered sugar
- 1 teaspoon vanilla extract
- 1 teaspoon pumpkin pie spice
- 1 cup crushed ginger snap cookies
- 1 cup whipped topping
Instructions
- In a large bowl, beat the cream cheese until smooth. Add the pumpkin puree, powdered sugar, vanilla extract, and pumpkin pie spice. Mix until well combined.
- In another bowl, whip the heavy cream until stiff peaks form. Gently fold the whipped cream into the pumpkin mixture until fully incorporated.
- In a trifle dish or individual cups, layer the pumpkin mixture, crushed ginger snap cookies, and whipped topping. Repeat the layers until you run out of ingredients, finishing with whipped topping on top.
- Chill in the refrigerator for at least 2 hours before serving to let the flavors meld together.
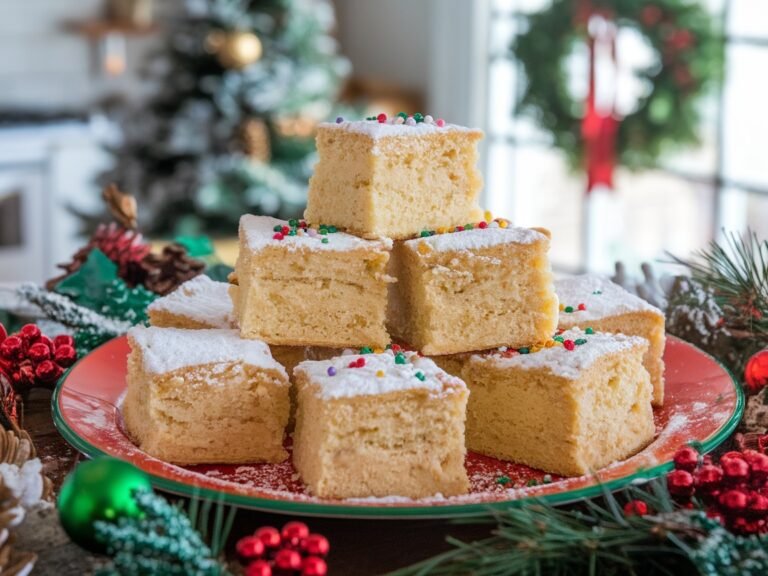
Eggnog Cheesecake Bars
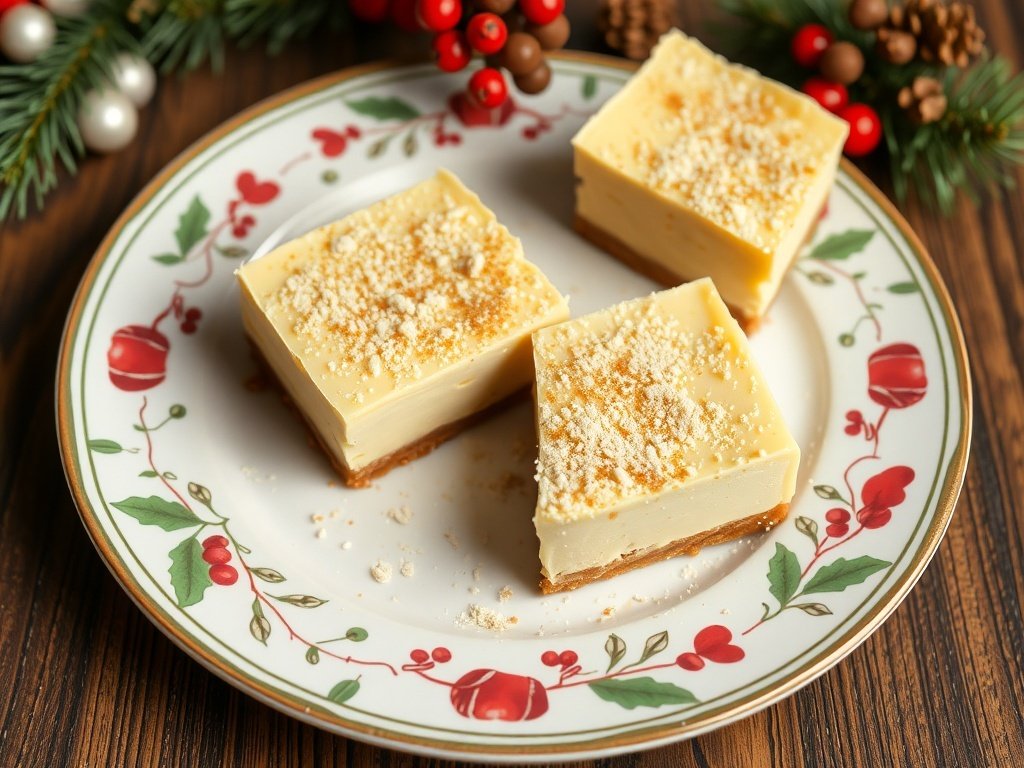
Eggnog Cheesecake Bars are a delightful twist on the classic holiday drink. These bars combine the creamy goodness of cheesecake with the festive flavors of eggnog. The smooth, rich filling sits atop a buttery graham cracker crust, making each bite a treat. The topping often includes a sprinkle of nutmeg or crushed cookies, adding a touch of holiday cheer.
These bars are perfect for holiday gatherings or cozy nights at home. They bring the warmth of the season right to your dessert table. Plus, they are easy to slice and serve, making them a great choice for parties.
Ingredients
- 1 1/2 cups graham cracker crumbs
- 1/3 cup granulated sugar
- 1/2 cup unsalted butter, melted
- 4 packages (8 oz each) cream cheese, softened
- 1 cup granulated sugar
- 4 large eggs
- 1 cup eggnog
- 1 teaspoon vanilla extract
- 1 teaspoon ground nutmeg
- 1/4 teaspoon ground cinnamon
Instructions
- Preheat the oven to 325°F (160°C). Grease a 9×13 inch baking pan.
- Make the crust: In a bowl, mix graham cracker crumbs, sugar, and melted butter. Press the mixture firmly into the bottom of the prepared pan.
- In a large mixing bowl, beat the cream cheese until smooth. Gradually add sugar and mix until well combined.
- Add eggs one at a time, mixing well after each addition. Then, stir in eggnog, vanilla, nutmeg, and cinnamon until smooth.
- Pour the cheesecake mixture over the crust and spread evenly. Bake for 40-45 minutes or until the center is set.
- Let the bars cool completely in the pan. Refrigerate for at least 4 hours before slicing.
- Serve chilled, garnished with a sprinkle of nutmeg or crushed cookies if desired.
Chocolate Hazelnut Yule Log
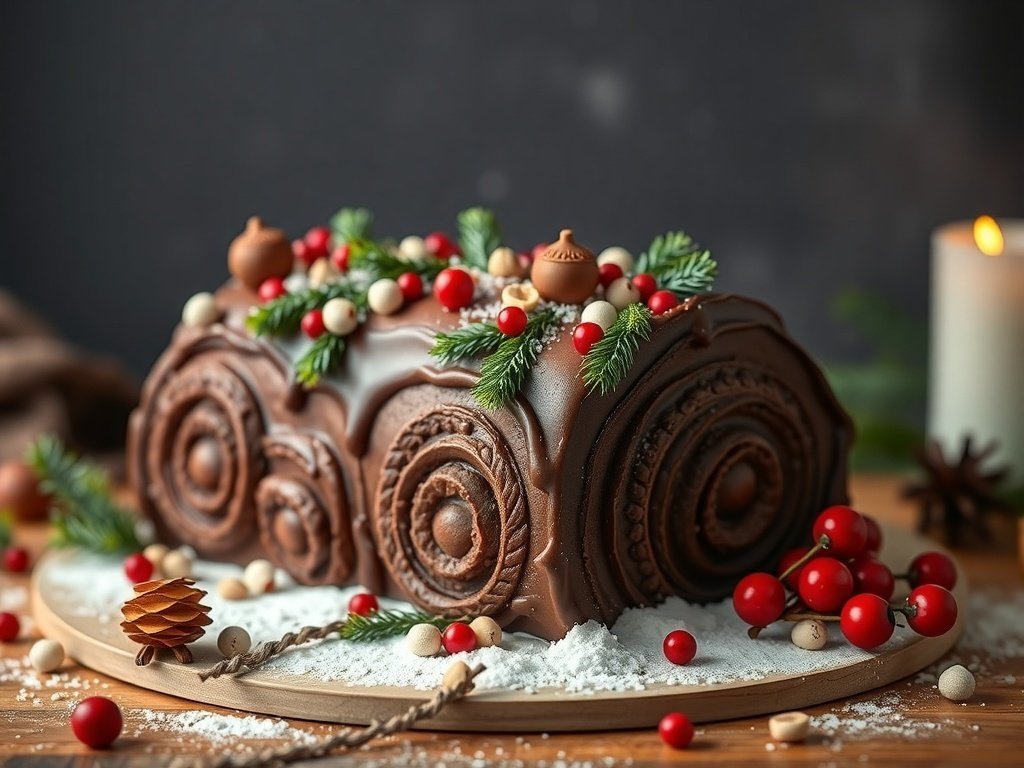
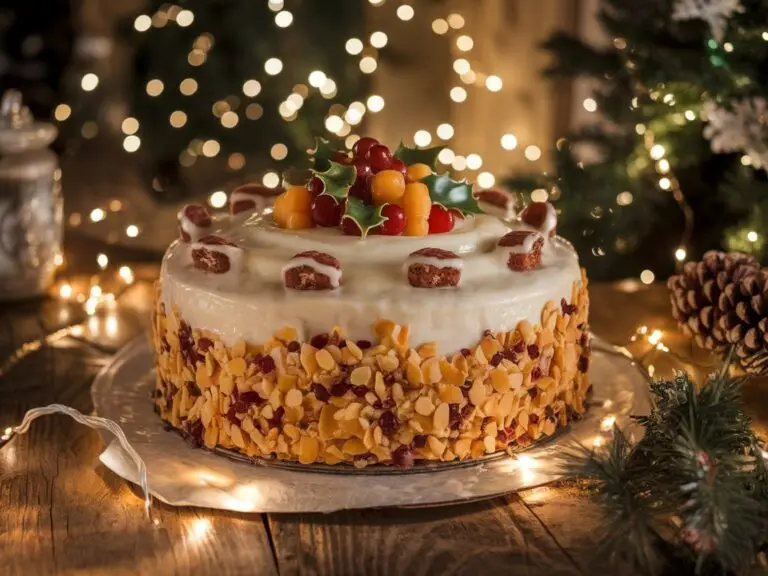
The Chocolate Hazelnut Yule Log is a festive treat that captures the essence of holiday cheer. This dessert features a rich chocolate sponge cake rolled with a creamy hazelnut filling, all covered in a luscious chocolate ganache. The decoration adds a touch of winter wonderland, with sprigs of greenery and bright red berries that make it a showstopper on any holiday table.
Creating this Yule Log is not only fun but also a great way to bring family and friends together. The combination of chocolate and hazelnut is simply irresistible, making it a favorite among dessert lovers. Plus, it’s a unique alternative to traditional holiday cakes.
To make your own Chocolate Hazelnut Yule Log, gather the ingredients and follow the steps below. You’ll have a stunning dessert that’s sure to impress!
Ingredients
- 1 cup all-purpose flour
- 1/2 cup unsweetened cocoa powder
- 1 teaspoon baking powder
- 1/4 teaspoon salt
- 3 large eggs
- 3/4 cup granulated sugar
- 1 teaspoon vanilla extract
- 1/2 cup hazelnut spread
- 1 cup heavy cream
- 1/2 cup powdered sugar
- 1/2 cup chocolate ganache (store-bought or homemade)
- Decorative items: fresh berries, sprigs of greenery, and edible ornaments
Instructions
- Preheat your oven to 350°F (175°C). Line a baking sheet with parchment paper.
- In a bowl, sift together flour, cocoa powder, baking powder, and salt. Set aside.
- In a separate bowl, whisk eggs and granulated sugar until light and fluffy. Stir in vanilla extract.
- Gradually fold the dry ingredients into the egg mixture until just combined.
- Pour the batter onto the prepared baking sheet and spread evenly. Bake for 12-15 minutes.
- Once baked, remove from the oven and let it cool slightly. Invert the cake onto a clean kitchen towel dusted with powdered sugar.
- Spread hazelnut spread evenly over the cake. Carefully roll the cake with the towel from one end to the other. Let it cool completely.
- Whip the heavy cream with powdered sugar until stiff peaks form. Unroll the cake and spread whipped cream over the hazelnut layer. Roll it back up without the towel.
- Place the rolled cake seam-side down on a serving platter. Cover with chocolate ganache and decorate with berries and greenery.
- Slice and serve, enjoying the festive flavors!
Sugar Cookie Snowflakes
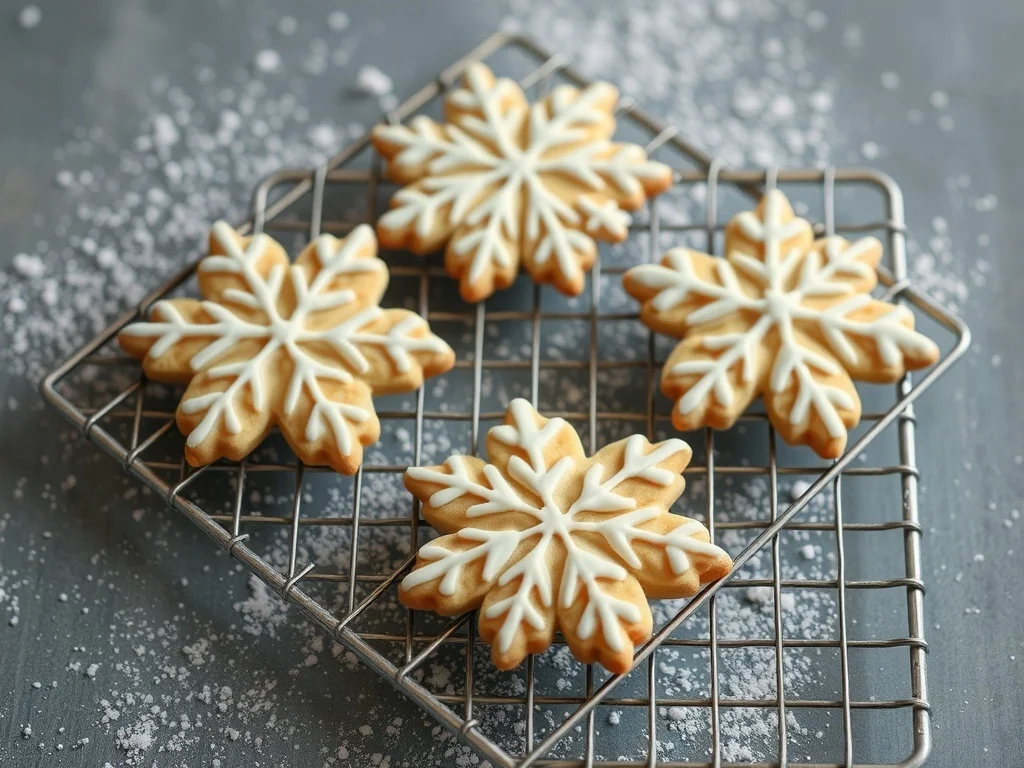
These sugar cookie snowflakes are a delightful treat that captures the magic of winter. Each cookie is shaped like a snowflake, making them perfect for holiday gatherings or cozy nights at home. The light golden color and intricate white icing create a beautiful contrast that is sure to impress.
Making these cookies is a fun activity for everyone. You can get creative with the designs and even let kids help with the decorating. The sweet aroma of baking cookies fills the kitchen, bringing warmth and joy to the season.
Here’s how you can make your own sugar cookie snowflakes at home!
Ingredients
- 2 3/4 cups all-purpose flour
- 1 teaspoon baking soda
- 1/2 teaspoon baking powder
- 1 cup unsalted butter, softened
- 1 1/2 cups white sugar
- 1 egg
- 1 teaspoon vanilla extract
- 1/2 teaspoon almond extract
- 3 cups powdered sugar
- 2 tablespoons milk
- 1 teaspoon vanilla extract (for icing)
Instructions
- Preheat the oven to 375°F (190°C).
- In a bowl, mix flour, baking soda, and baking powder. Set aside.
- In another bowl, cream together the butter and sugar until smooth. Beat in the egg, vanilla extract, and almond extract.
- Gradually blend the dry ingredients into the creamed mixture.
- Roll rounded teaspoonfuls of dough into balls, then place them on ungreased cookie sheets. Flatten each ball with the bottom of a glass.
- Bake for 8 to 10 minutes in the preheated oven. Let cool on wire racks.
- For the icing, mix powdered sugar, milk, and vanilla extract until smooth. Decorate the cooled cookies with icing to create beautiful snowflake designs.
Cinnamon Roll Bread Pudding
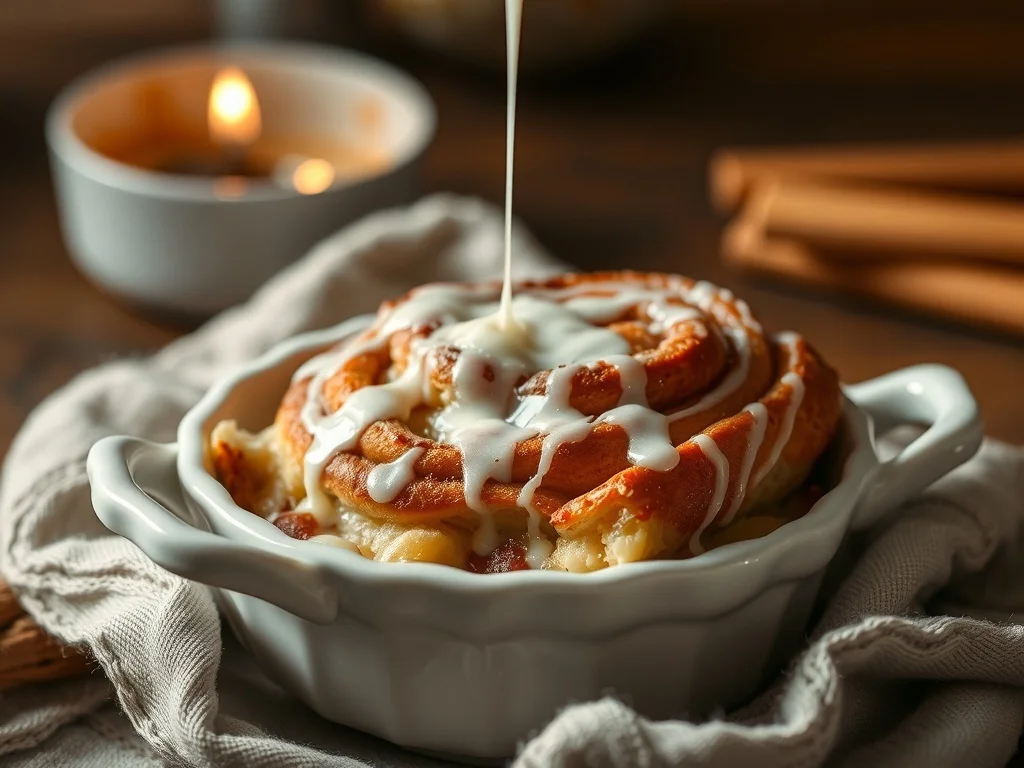
Cinnamon Roll Bread Pudding is a delightful twist on two classic treats. Imagine soft, gooey cinnamon rolls transformed into a warm, comforting dessert. This dish combines the best of both worlds, offering the rich flavors of cinnamon rolls with the creamy texture of bread pudding.
The image captures this delicious creation perfectly. You can see the cinnamon roll nestled in a charming dish, drizzled with a sweet icing that adds a touch of decadence. The warm tones of the cinnamon and the soft white of the icing create an inviting look that makes you want to dig in right away.
This dessert is perfect for holiday gatherings or cozy nights in. It’s easy to make and sure to impress your family and friends. Let’s get started on making this scrumptious treat!
Ingredients
- 4 large cinnamon rolls, cut into cubes
- 2 cups milk
- 1/2 cup heavy cream
- 3 large eggs
- 1/2 cup granulated sugar
- 1 teaspoon vanilla extract
- 1 teaspoon ground cinnamon
- 1/4 teaspoon salt
- 1/2 cup raisins or nuts (optional)
Instructions
- Preheat your oven to 350°F (175°C). Grease a baking dish.
- In a large bowl, whisk together the milk, heavy cream, eggs, sugar, vanilla, cinnamon, and salt until well combined.
- Add the cubed cinnamon rolls to the mixture and gently fold until they are soaked.
- If using, stir in raisins or nuts for added texture.
- Pour the mixture into the prepared baking dish and spread it evenly.
- Bake for 30-35 minutes, or until the top is golden brown and the pudding is set.
- Let it cool slightly before serving. Drizzle with icing or serve with whipped cream if desired.
Spiced Cranberry Orange Muffins
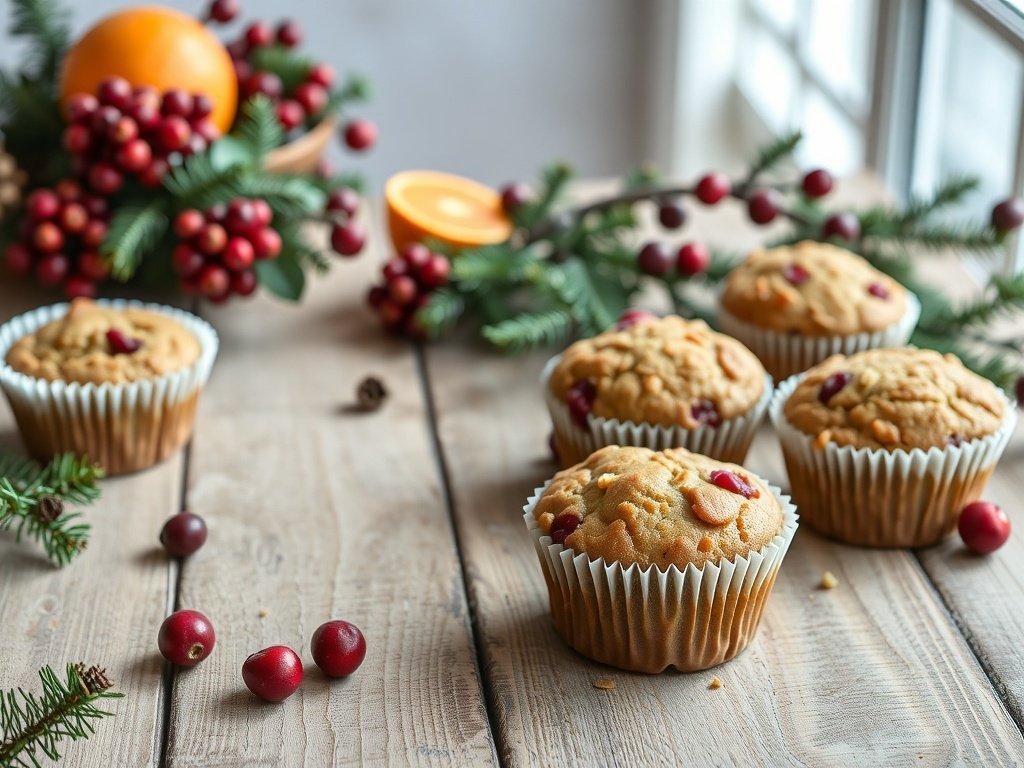
Spiced Cranberry Orange Muffins are a delightful treat for the holiday season. These muffins combine the tartness of cranberries with the bright flavor of oranges, creating a perfect balance. The warm spices add a cozy touch, making them ideal for chilly mornings or festive gatherings.
The image showcases these muffins beautifully arranged, surrounded by fresh cranberries and vibrant orange slices. The natural colors and textures bring a festive feel, perfect for your holiday table.
Making these muffins is simple and rewarding. They fill your kitchen with a warm, inviting aroma that will have everyone asking for the recipe!
Ingredients
- 1 ½ cups all-purpose flour
- 1 cup fresh cranberries, chopped
- 1 orange, zested and juiced
- ½ cup granulated sugar
- ½ cup brown sugar
- 1 teaspoon baking powder
- ½ teaspoon baking soda
- ½ teaspoon salt
- 1 teaspoon ground cinnamon
- ½ teaspoon ground nutmeg
- ½ cup unsalted butter, melted
- 2 large eggs
- ½ cup buttermilk
Instructions
- Preheat the oven to 350°F (175°C) and line a muffin tin with paper liners.
- In a large bowl, mix together the flour, granulated sugar, brown sugar, baking powder, baking soda, salt, cinnamon, and nutmeg.
- In another bowl, whisk together the melted butter, eggs, buttermilk, orange juice, and orange zest.
- Pour the wet ingredients into the dry ingredients and stir until just combined. Gently fold in the chopped cranberries.
- Divide the batter evenly among the muffin cups, filling each about ¾ full.
- Bake for 18-20 minutes or until a toothpick inserted in the center comes out clean.
- Let the muffins cool in the pan for a few minutes before transferring them to a wire rack to cool completely.
White Chocolate Raspberry Mousse
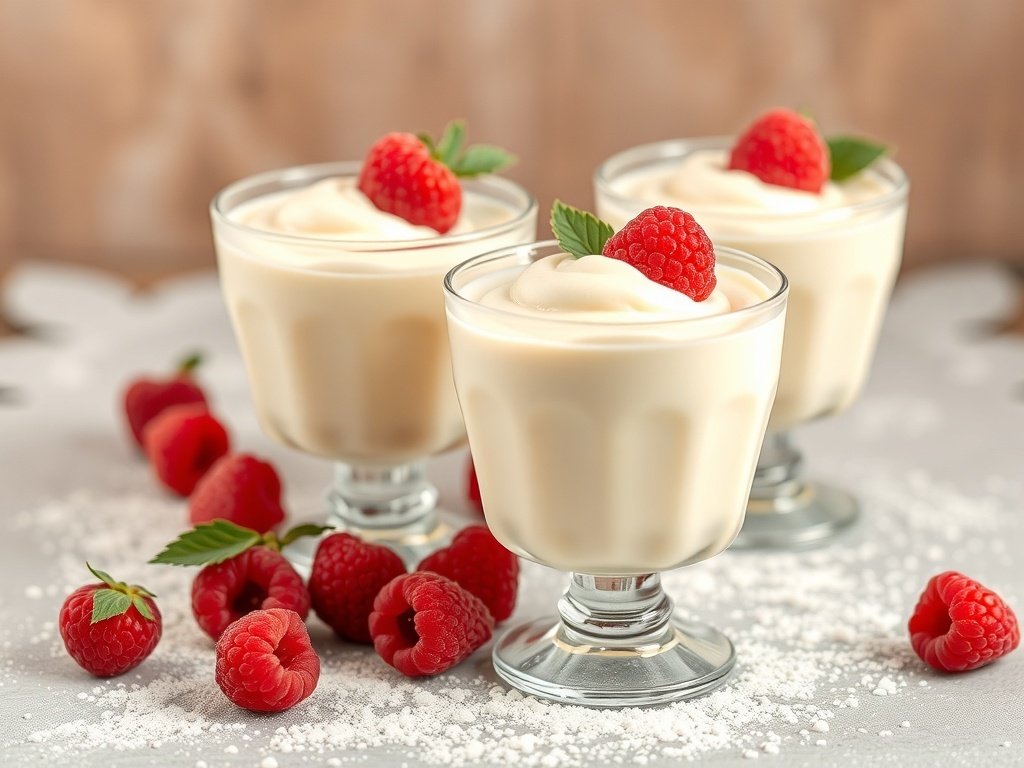
White chocolate raspberry mousse is a delightful treat that captures the essence of the holiday season. The creamy texture of the mousse pairs perfectly with the tartness of fresh raspberries, creating a dessert that’s both rich and refreshing. Each spoonful is a little burst of joy, making it a perfect addition to your Christmas dessert lineup.
In the image, you can see elegant cups filled with smooth white chocolate mousse, topped with vibrant raspberries and a sprig of mint. The presentation is simple yet inviting, making it a showstopper on any dessert table. The dusting of powdered sugar adds a touch of sweetness and charm.
This dessert is not only delicious but also easy to make. It’s a great way to impress your guests without spending hours in the kitchen. Let’s get to the recipe!
Ingredients
- 8 ounces white chocolate, chopped
- 1 cup heavy cream
- 1 teaspoon vanilla extract
- 2 cups fresh raspberries
- 2 tablespoons sugar
- 1 tablespoon lemon juice
- Mint leaves for garnish
Instructions
- Melt the White Chocolate: In a microwave-safe bowl, melt the white chocolate in 30-second intervals, stirring in between until smooth. Let it cool slightly.
- Whip the Cream: In a separate bowl, whip the heavy cream and vanilla extract until soft peaks form.
- Combine: Gently fold the melted white chocolate into the whipped cream until fully incorporated.
- Prepare the Raspberries: In another bowl, mix the raspberries with sugar and lemon juice. Mash slightly to release some juice.
- Layer: In serving cups, layer the mousse and raspberry mixture. Start with a layer of mousse, followed by a layer of raspberries, and repeat until the cups are filled.
- Chill: Refrigerate for at least 2 hours before serving. This allows the flavors to meld beautifully.
- Serve: Garnish with mint leaves and extra raspberries before serving. Enjoy your festive treat!
Candy Cane Cupcakes
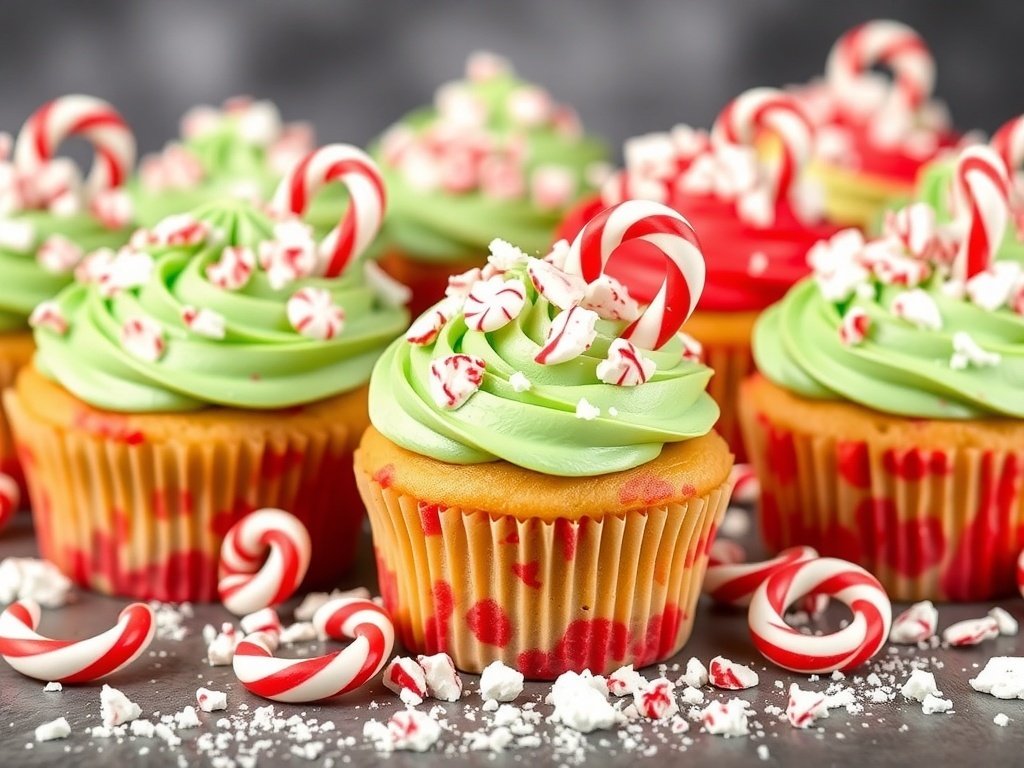
Candy Cane Cupcakes are a festive treat that perfectly capture the spirit of the holiday season. These delightful cupcakes are not only visually appealing but also bursting with flavor. The base is a soft, moist vanilla cupcake, speckled with bits of red candy cane for that extra holiday cheer.
The frosting is where the magic happens. A bright green buttercream swirls on top, reminiscent of a Christmas tree, and is adorned with mini candy canes and crushed peppermint. Each bite is a sweet reminder of the holidays, making them perfect for parties or cozy family gatherings.
These cupcakes are easy to make and a joy to decorate. They bring a pop of color and a touch of whimsy to any dessert table. Plus, they’re a fun project to do with kids, who will love helping with the decorating!
Ingredients
- 1 ½ cups all-purpose flour
- 1 cup granulated sugar
- ½ cup unsalted butter, softened
- 2 large eggs
- 1 teaspoon vanilla extract
- 1 ½ teaspoons baking powder
- ½ teaspoon salt
- ½ cup milk
- ½ cup crushed candy canes
- 2 cups powdered sugar
- 1 cup unsalted butter, softened
- 2-3 tablespoons milk
- 1 teaspoon peppermint extract
- Green food coloring
- Mini candy canes for decoration
Instructions
- Preheat your oven to 350°F (175°C) and line a cupcake pan with liners.
- In a large bowl, cream together the softened butter and sugar until light and fluffy. Add the eggs one at a time, mixing well after each addition. Stir in the vanilla.
- In another bowl, whisk together the flour, baking powder, and salt. Gradually add this to the butter mixture, alternating with the milk. Mix until just combined, then fold in the crushed candy canes.
- Divide the batter evenly among the cupcake liners, filling each about two-thirds full. Bake for 18-20 minutes, or until a toothpick comes out clean. Let them cool completely.
- For the frosting, beat the softened butter until creamy. Gradually add the powdered sugar, mixing well. Add the peppermint extract and milk until you reach your desired consistency. Mix in green food coloring until you achieve a festive shade.
- Frost the cooled cupcakes using a piping bag or a spatula. Top with mini candy canes and crushed peppermint for decoration.
Pecan Pie Brownies
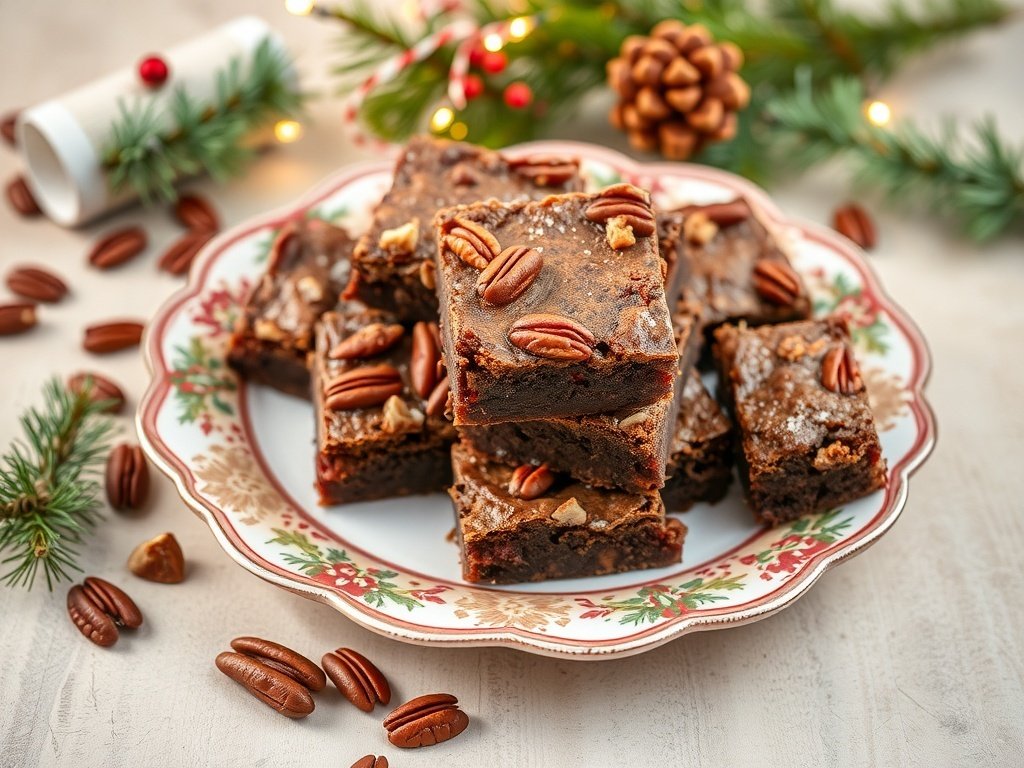
Pecan Pie Brownies are a delightful treat that combines the rich flavors of chocolate brownies with the nutty sweetness of pecan pie. The image captures a beautiful plate of these brownies, topped with whole pecans and sprinkled with a hint of salt. The festive presentation, complete with holiday decorations, makes them perfect for the Christmas season.
These brownies are not just a dessert; they bring a warm, cozy feeling to your holiday gatherings. The fudgy texture pairs wonderfully with the crunchy pecans, creating a dessert that everyone will love. Whether you’re hosting a party or simply enjoying a quiet night at home, these brownies will surely brighten your day.
Ingredients
- 1 cup unsalted butter
- 2 cups granulated sugar
- 4 large eggs
- 1 teaspoon vanilla extract
- 1 cup all-purpose flour
- 1 cup unsweetened cocoa powder
- 1/2 teaspoon salt
- 1 cup chopped pecans
- 1 cup corn syrup
- 1 cup brown sugar
- 1 teaspoon vanilla extract
- 3 large eggs
- 1 1/2 cups whole pecans (for topping)
Instructions
- Preheat your oven to 350°F (175°C). Grease a 9×13 inch baking pan.
- In a large bowl, melt the butter and mix in the granulated sugar until well combined. Add the eggs and vanilla extract, mixing until smooth.
- In another bowl, whisk together the flour, cocoa powder, and salt. Gradually add this dry mixture to the wet ingredients, stirring until just combined.
- Fold in the chopped pecans and pour the brownie batter into the prepared baking pan.
- In a separate bowl, mix the corn syrup, brown sugar, vanilla extract, and eggs until smooth. Pour this mixture over the brownie batter.
- Sprinkle the whole pecans on top and bake for 30-35 minutes, or until a toothpick inserted in the center comes out with a few moist crumbs.
- Let the brownies cool in the pan before cutting them into squares. Enjoy these delicious treats with family and friends!
Molasses Spice Cookies
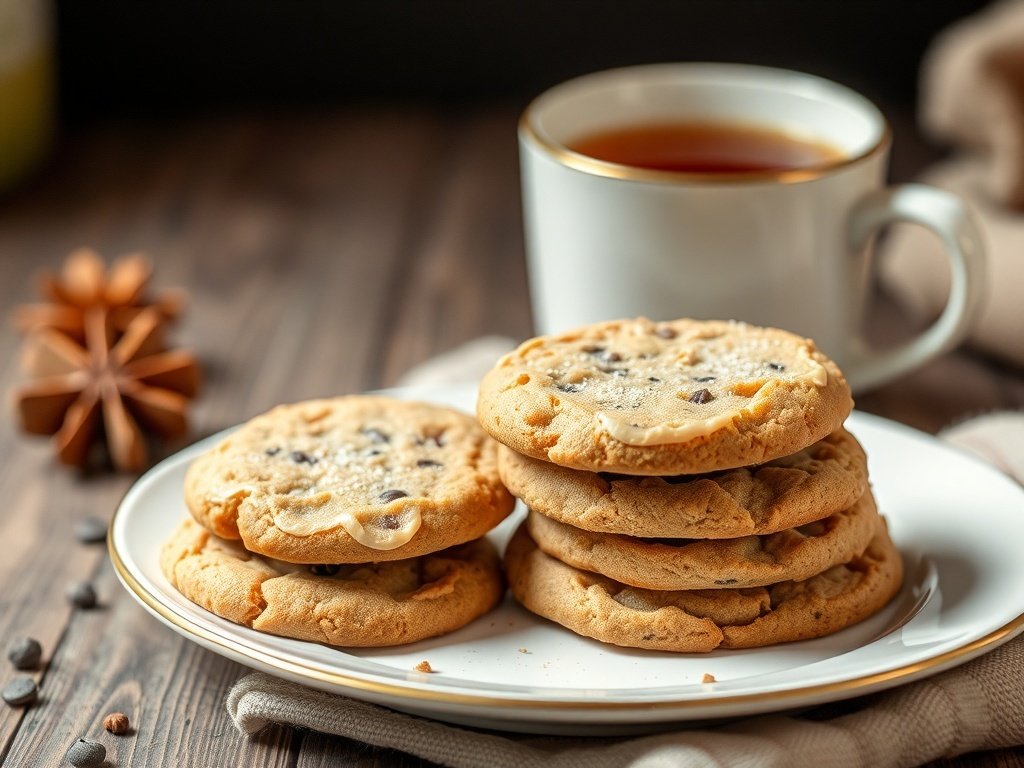
Molasses spice cookies are a delightful treat that perfectly capture the essence of the holiday season. With their warm, rich flavor and soft texture, these cookies are a must-have for any festive gathering. The blend of spices like cinnamon and ginger adds a cozy touch, making them ideal for sharing with friends and family.
Imagine a plate stacked high with these cookies, accompanied by a warm cup of tea or coffee. The aroma of molasses and spices fills the air, inviting everyone to indulge. These cookies are not just tasty; they also bring a sense of nostalgia, reminding us of holiday traditions and family gatherings.
Ingredients
- 3/4 cup unsalted butter, softened
- 1 cup brown sugar, packed
- 1/2 cup molasses
- 1 large egg
- 2 1/4 cups all-purpose flour
- 2 teaspoons baking soda
- 1 teaspoon ground cinnamon
- 1 teaspoon ground ginger
- 1/2 teaspoon ground cloves
- 1/2 teaspoon salt
- 1/4 cup granulated sugar (for rolling)
Instructions
- Preheat the oven to 350°F (175°C). Line a baking sheet with parchment paper.
- In a large bowl, cream together the softened butter and brown sugar until light and fluffy. Add the molasses and egg, mixing until well combined.
- In another bowl, whisk together the flour, baking soda, cinnamon, ginger, cloves, and salt.
- Gradually add the dry ingredients to the wet mixture, stirring until a dough forms.
- Roll the dough into small balls, then roll each ball in granulated sugar before placing them on the prepared baking sheet.
- Bake for 8-10 minutes, or until the edges are set and the tops are slightly cracked. Let them cool on the baking sheet for a few minutes before transferring to a wire rack.